
Hello Today – double page layout with Heidi Swapp
7:00:00 AM
I think the reason I love Heidi Swapp products so much is because of her elegant and versatile style. There’s something for everyone and even if the collection scream ‘girl’ there is plenty in there to make boy projects too – it really is that versatile and adaptable.
So when I got my hand on the new products that will be available from The Wholesaler I was in heaven! The new paper pads are so amazing, colourful and simply gorgeous. The combination of teal, navy, brown and pink is stunning and with those combinations you can really do just about anything you set your mind to.

So I
had some special photos taken recently and since the papers was calling me to
use them I had to make a double page layout. I combined some pretty pastel
shade papers with bold navy, gold embossing and stickers and subtly background
stamping – everything about this layout I really love, and I think it has
everything to do with the gorgeous products from HS.
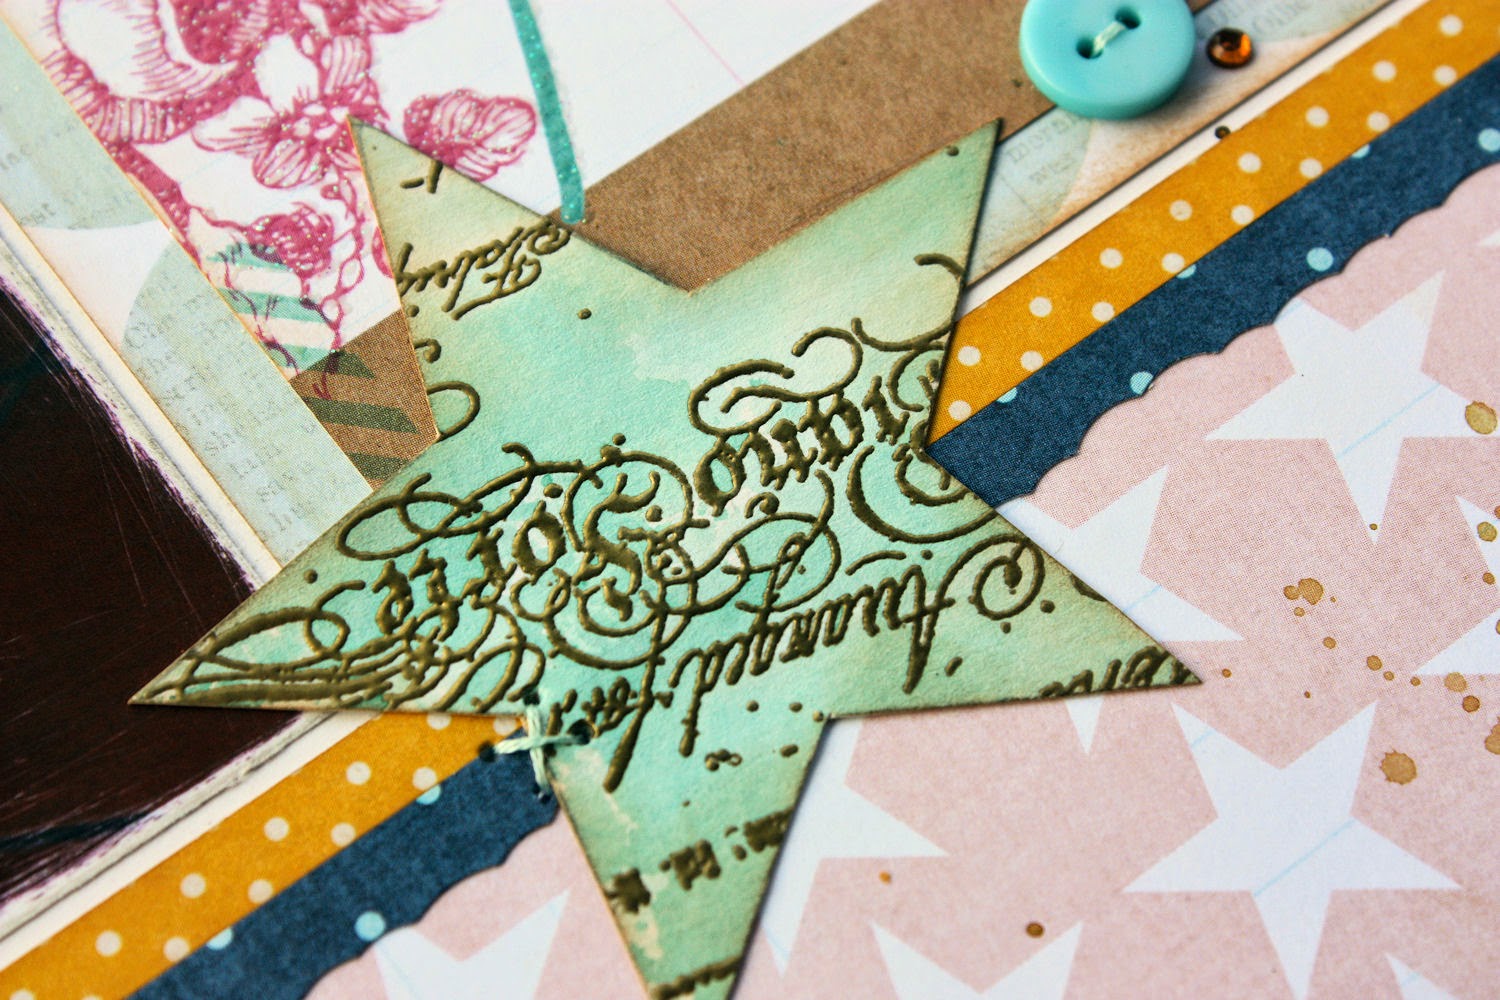
I
used one of the large background stamps and embossed it in gold onto white
cardstock. Once the embossing cooled down I used some inks to add colour to the
background to match the patterned paper. Embossing still is one of my favourite
techniques and always looks stunning!
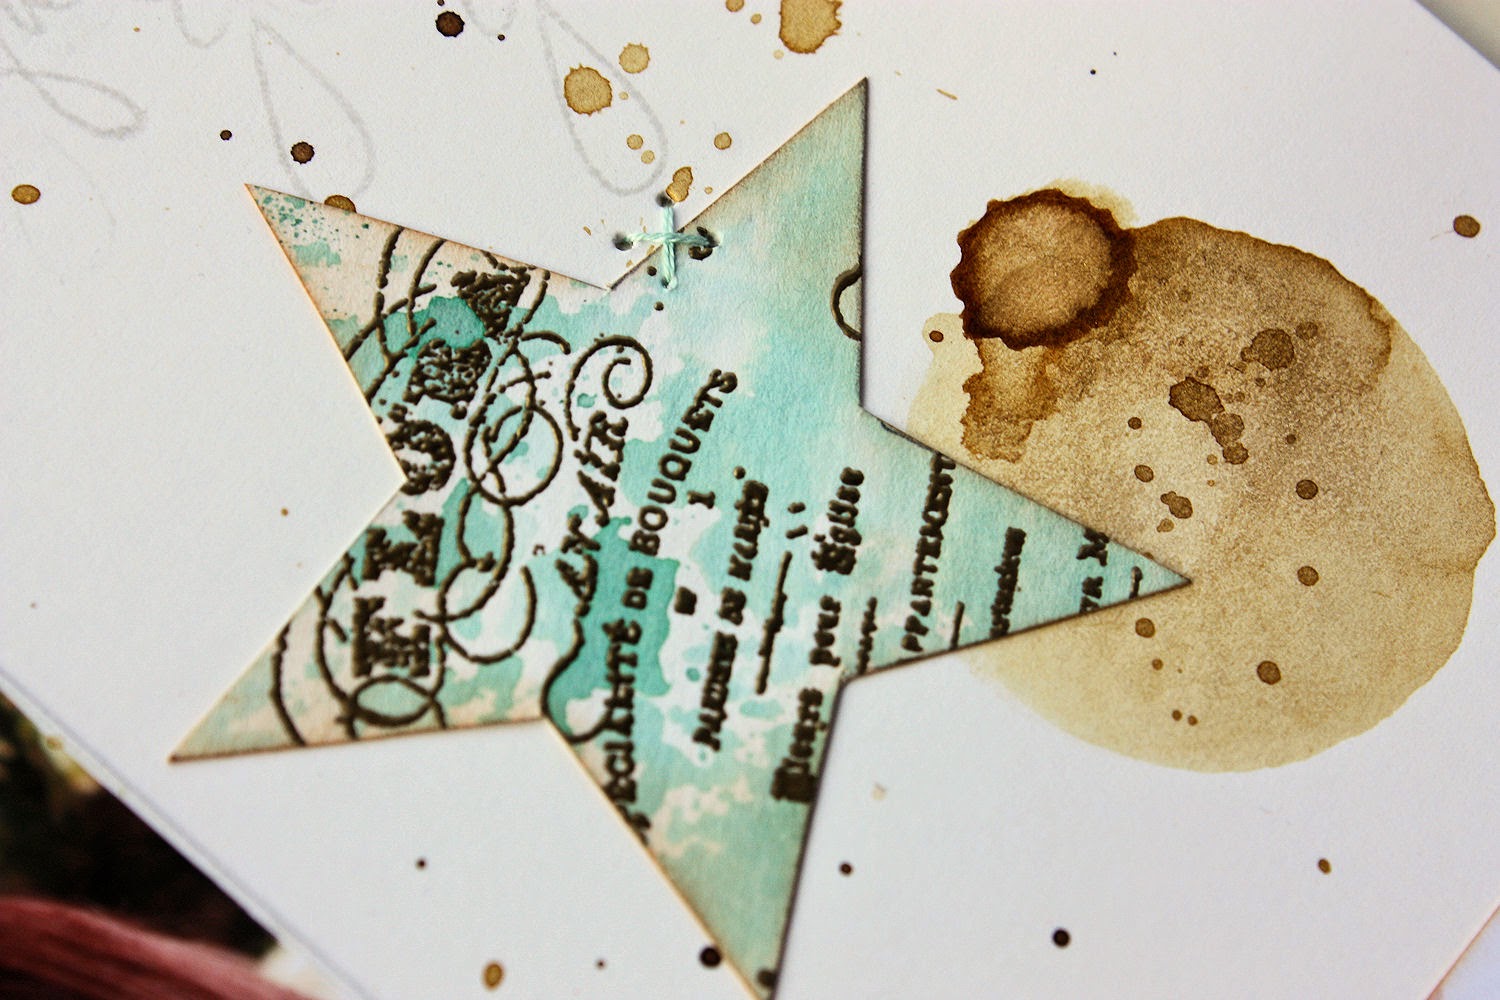
In
the background I used some of her wording stamps and repeatedly stamped the
word ‘grateful’ in a light grey ink pad. I stamped it so that it would overlap
each other in a random fashion inking once and stamping twice to give me darker
and lighter images. A fun and totally random effect.

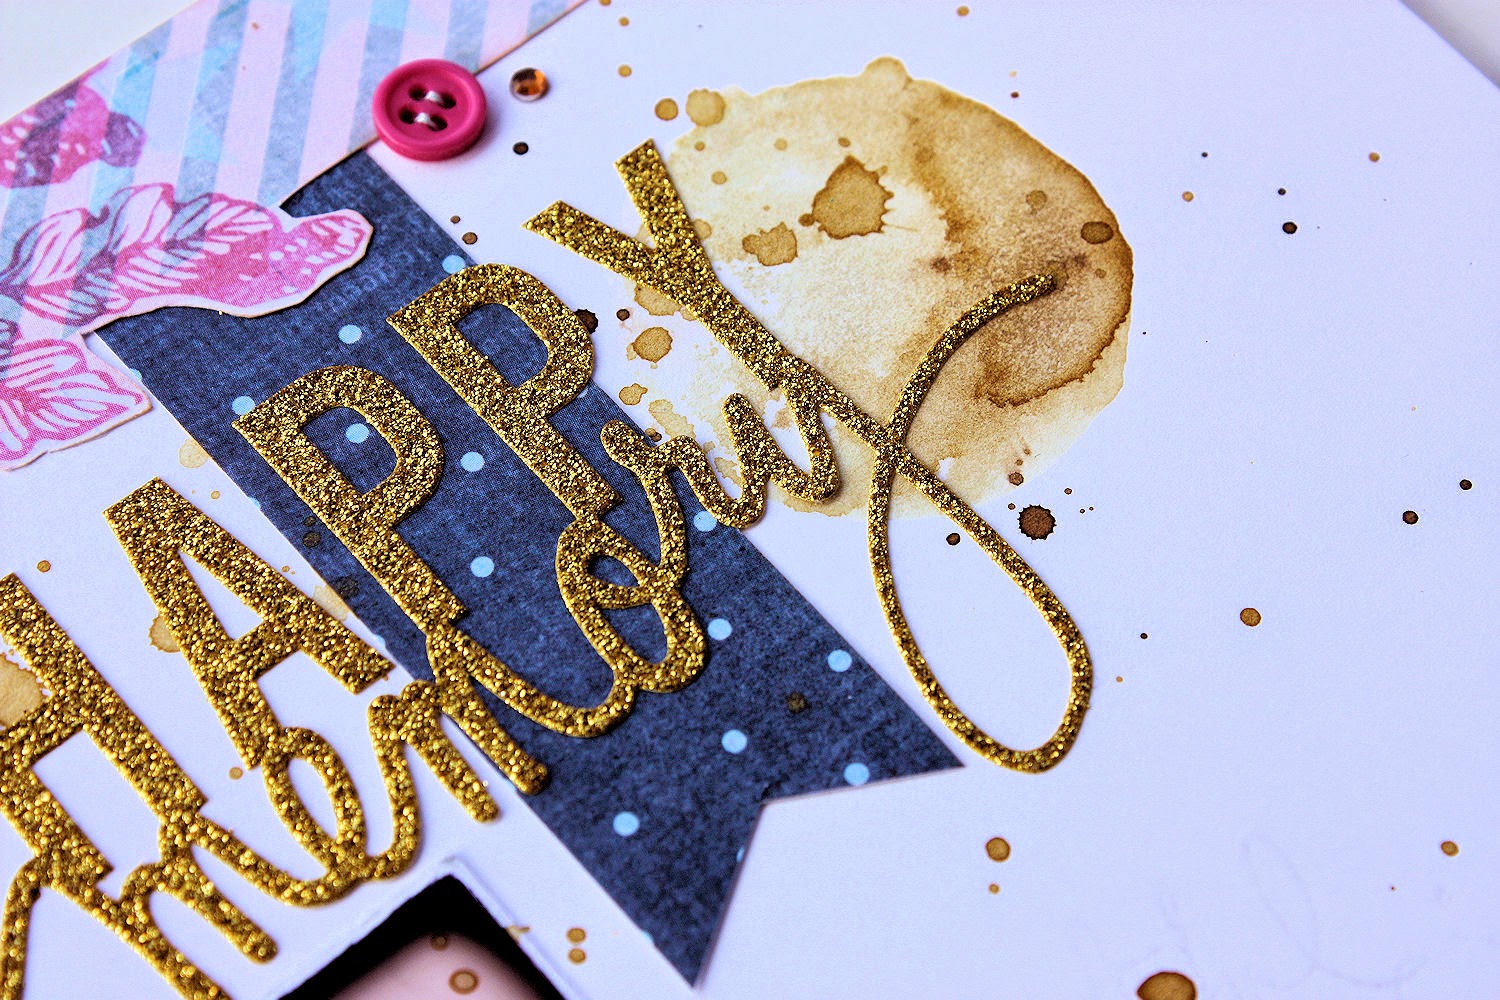
I
love her new range of glitter stickers in her handwriting. They really are
super versatile and easy to use. Any layout without writing in some form or
manner will be incomplete, and these are just beautiful!
I
can’t wait to get my hands on the next set of new products from Heidi Swapp –
functional, beautiful and inspirational!
Two tone stamping with Mister Huey inks
step 1 - Mist classic tan Mister Huey onto your craft sheet, on top of
the tan mist Gold Mister Huey ink
step 1 - Mist classic tan Mister Huey onto your craft sheet, on top of
the tan mist Gold Mister Huey ink
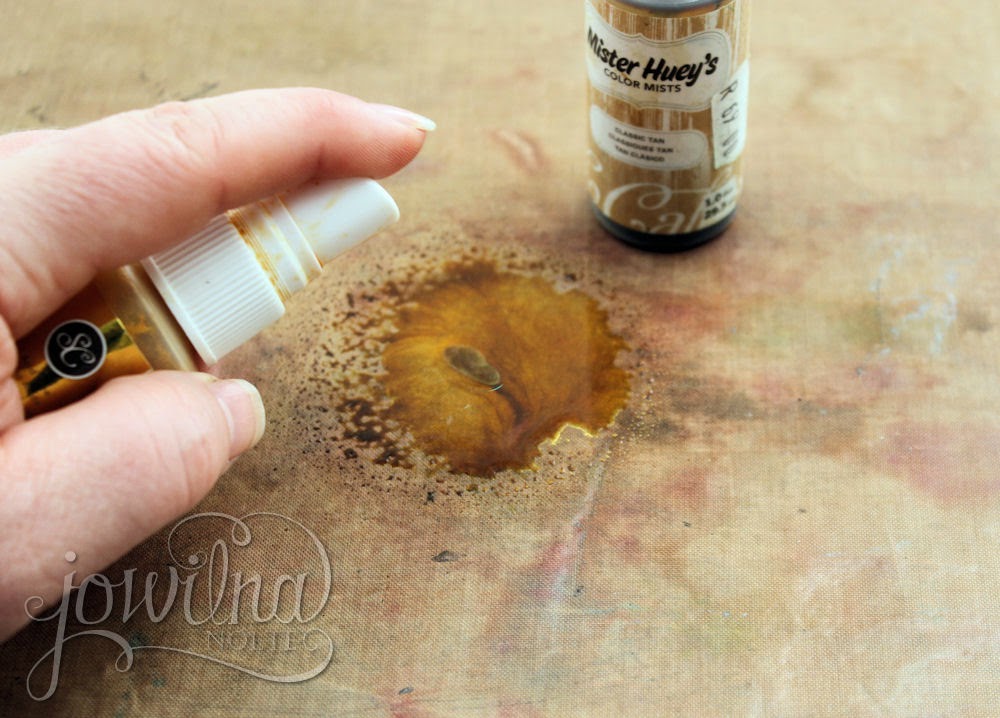
Step 2 - cut a circle from fun foam and adhere it to an acrylic block with some double sided tape. Press the custom made stamp into the ink and move it around a bit to mix the inks

step 3 - carefully lift the stamp and press it onto your cardstock where you want your image. Hold your paper and lift the stamp
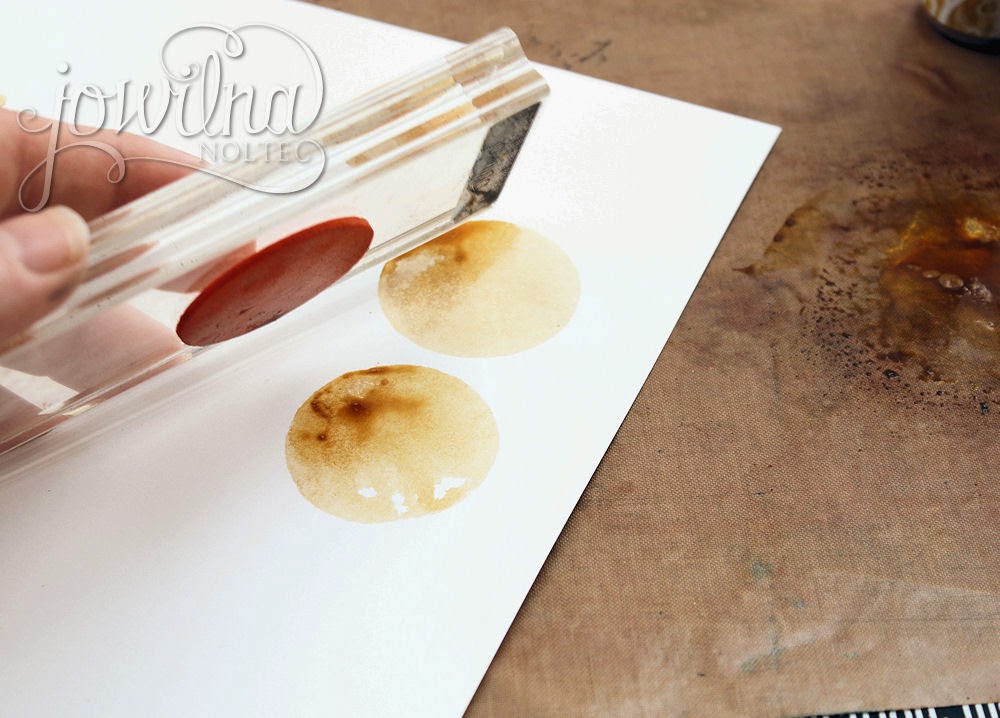
TIP: Keep in mind, if your stamp is too wet with the liquid ink, when you lift if the ink will simply drip off of the stamp and even land where you don't want it to land on your project.
because Mister Huey inks are not too runny you shouldn't have a problem but should you mist the ink with water you may want to be aware that this could happen
Products used
Heidi Swapp Stickers HS01108
Heidi Swapp Stamp HS01140
Heidi Swapp Paper Pad Hello Today HS01155
ZING! Metallic Embossing Powder 1 oz – Gold AC 27158
VersaMark Watermark Ink Pad TVM-001
until next time - have a wonderfully creative week!


0 comments