
Mixed Media Project Life Cards – All Dressed Up for Christmas.
5:15:00 PM
Every year we make loads of promises to ourselves to get more organized
around the holidays and festive season. And each year we forget to take
photos of the little moments, the big moments and life kind of just
gallops away.
So this year I am getting all organized – yes I am on a mission! Since
Christmas in South Africa is normally a fun festive and HOT occasion, I
wanted to use summery colours, and the first thing that came to mind was
the new Project Life kit “Hi Sunshine”. So I simply dressed them up to
have a festive look and threw in some mixed media products to alter them
with a little more personality and oomph. So now all I need to do is
take those photos and get my pages done before Jan 1st!

Card 1
For this card I used a Prima stencil and added the Opaque modelling paste through the stencil in the left hand corner of my card. The reindeer head is a jpg. image I cut on the Silhouette in smooth black American Crafts cardstock and then misted with Gold Leaf Color Bloom mist. Once the modelling paste was dry I inked over the top with a finger dauber and some brown ink to highlight the texture.
For this card I used a Prima stencil and added the Opaque modelling paste through the stencil in the left hand corner of my card. The reindeer head is a jpg. image I cut on the Silhouette in smooth black American Crafts cardstock and then misted with Gold Leaf Color Bloom mist. Once the modelling paste was dry I inked over the top with a finger dauber and some brown ink to highlight the texture.
Card 2
For this car I added 3 little triangles using the modelling paste through a Heidi Swapp stencil. The bottom half of the card has a Christmas phrase and some red polka dot paper cut from another PL card.
For this car I added 3 little triangles using the modelling paste through a Heidi Swapp stencil. The bottom half of the card has a Christmas phrase and some red polka dot paper cut from another PL card.

Card 3
I covered most of the background of this card with the same triangle
stencil and modelling paste from Heidi Swapp, and then added the word
Christmas on top using a stapler. Quick and easy! 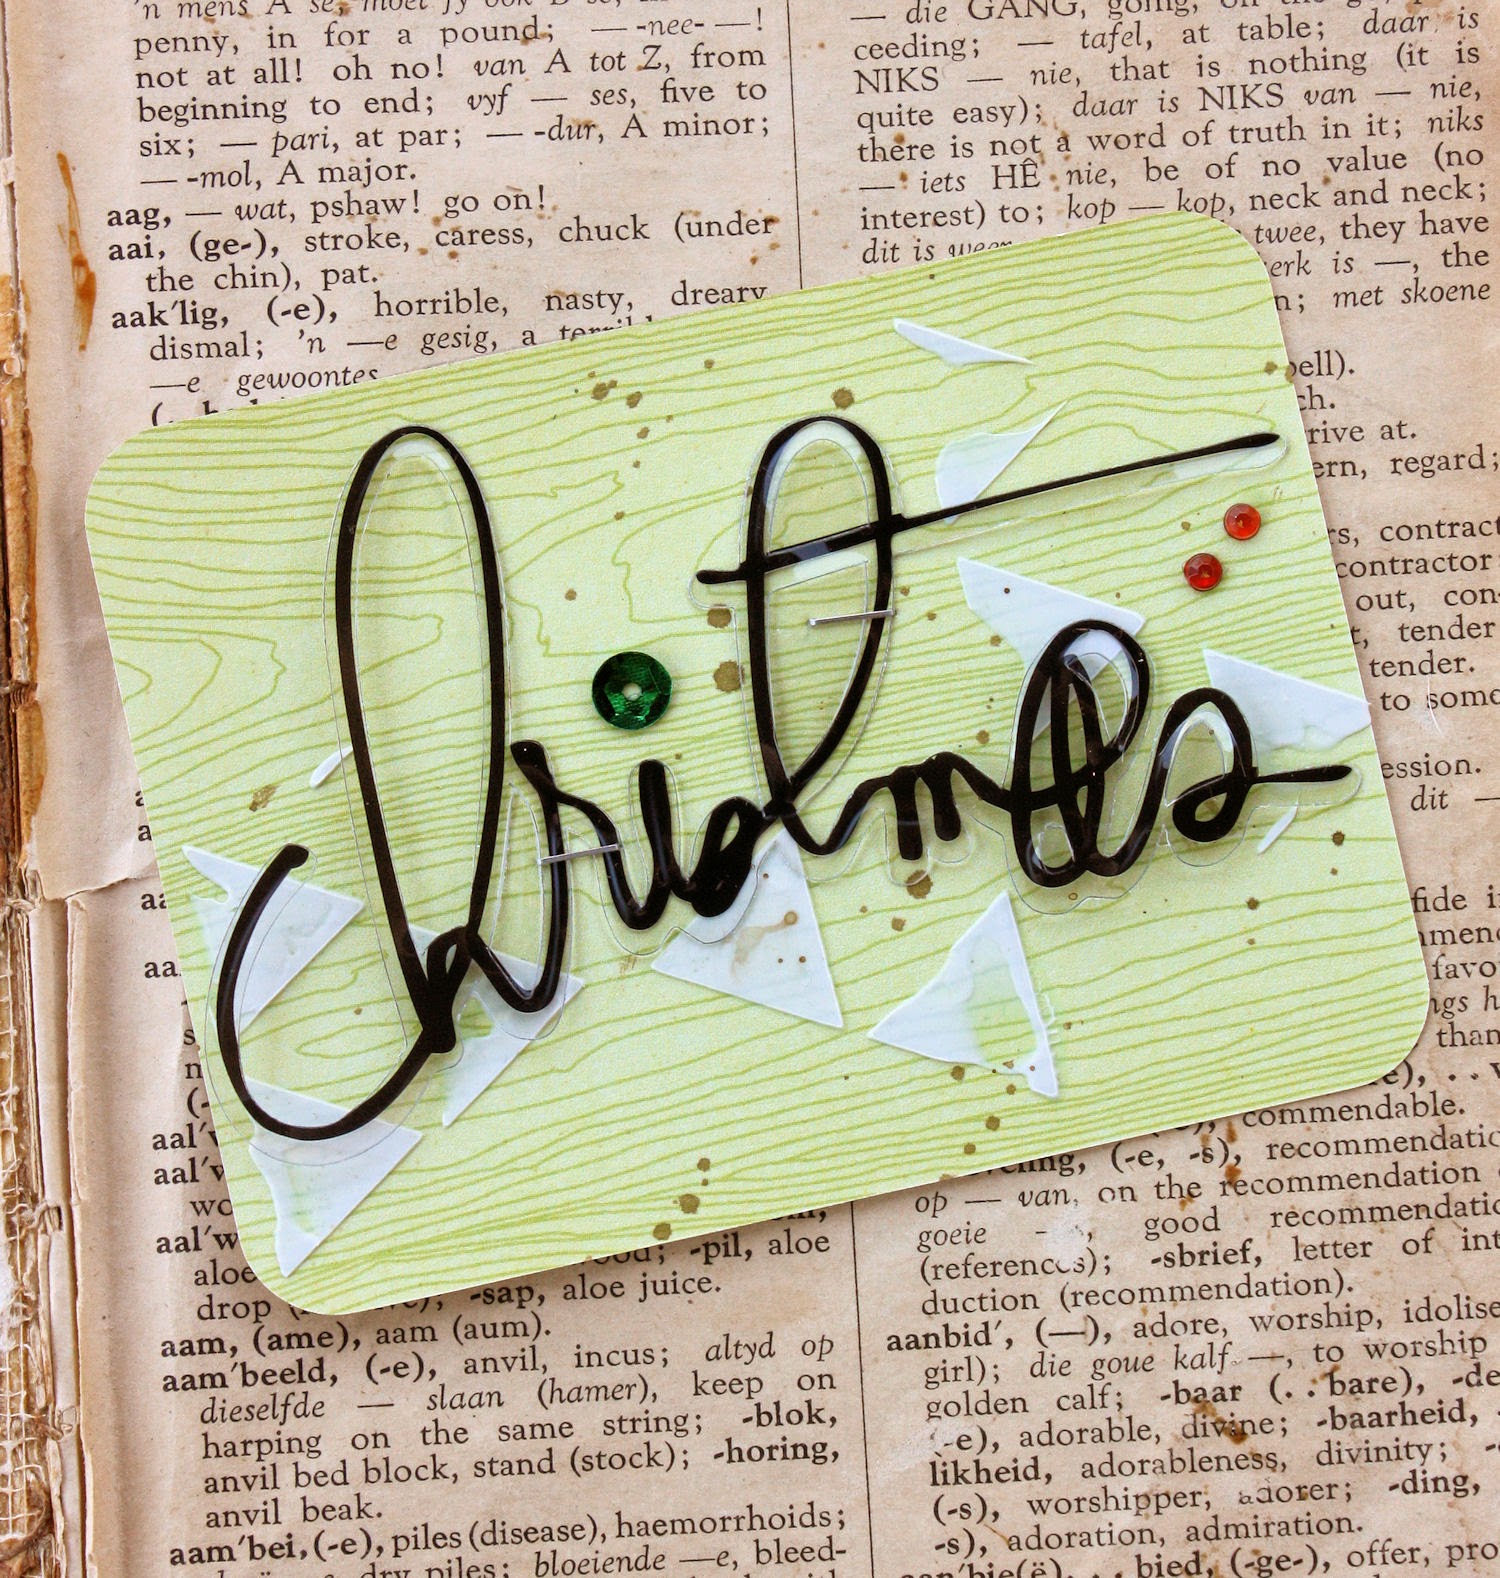
Card 4
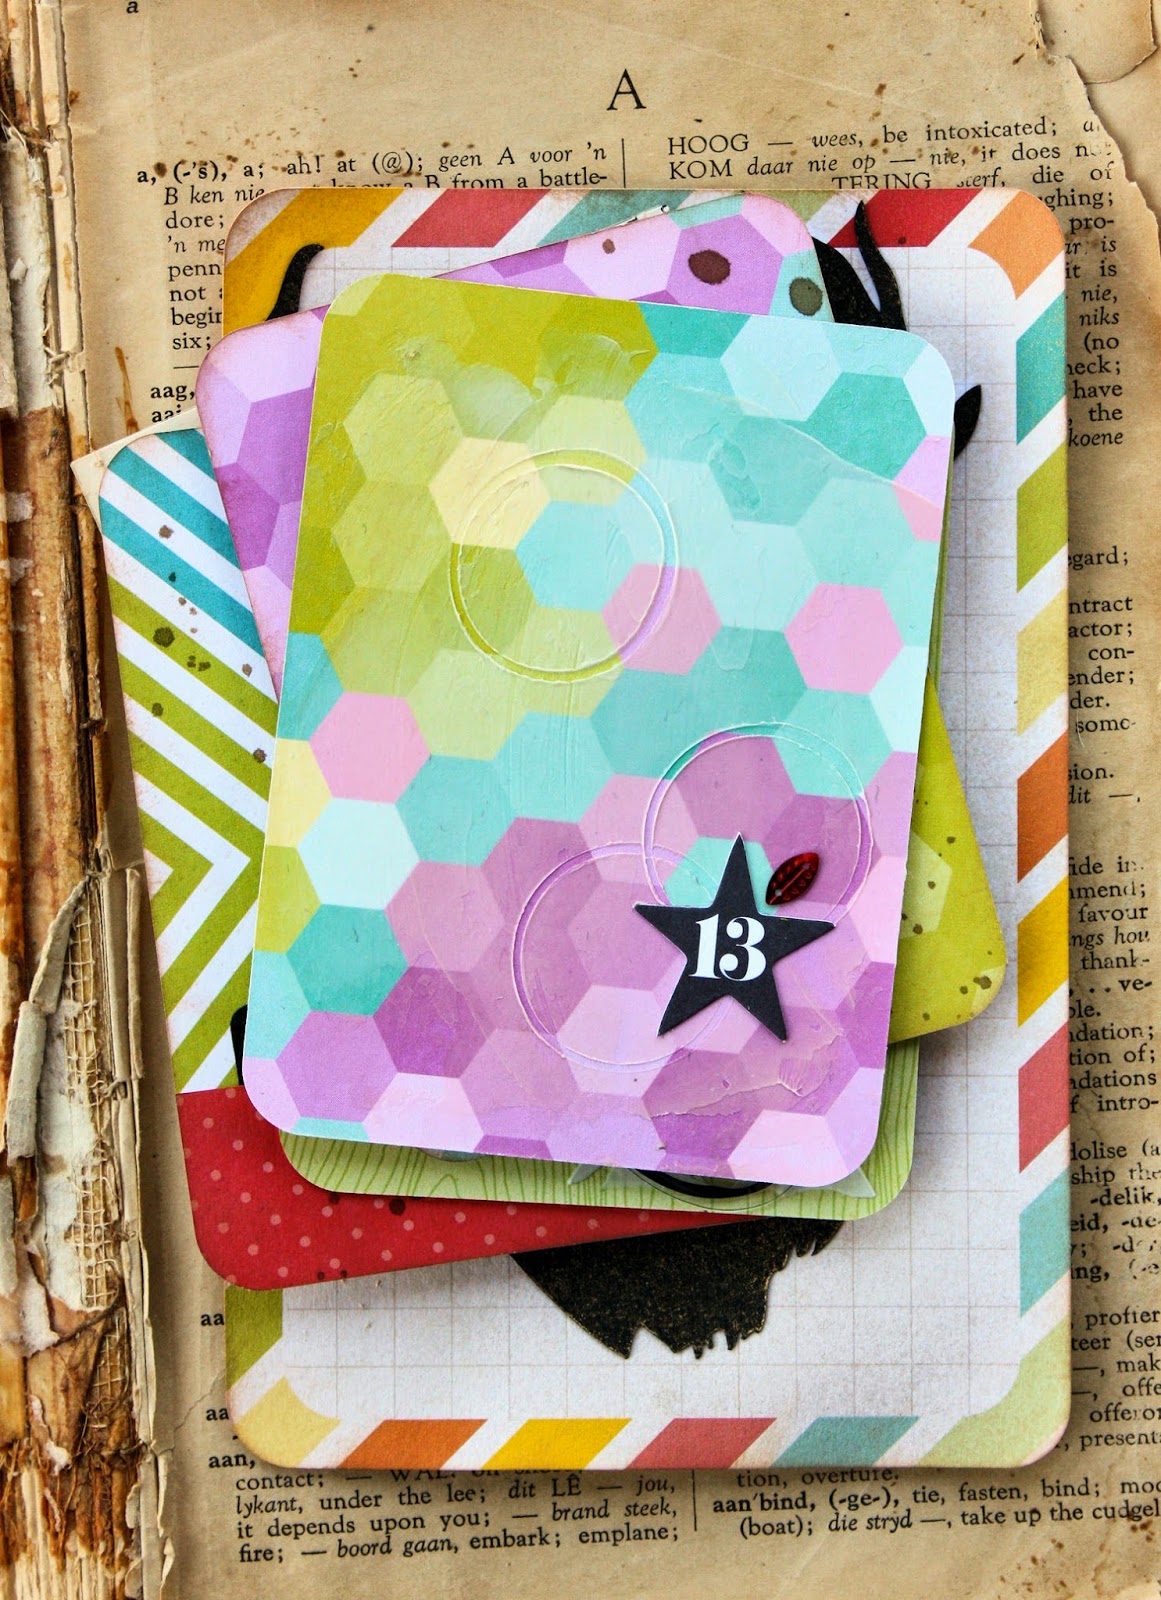
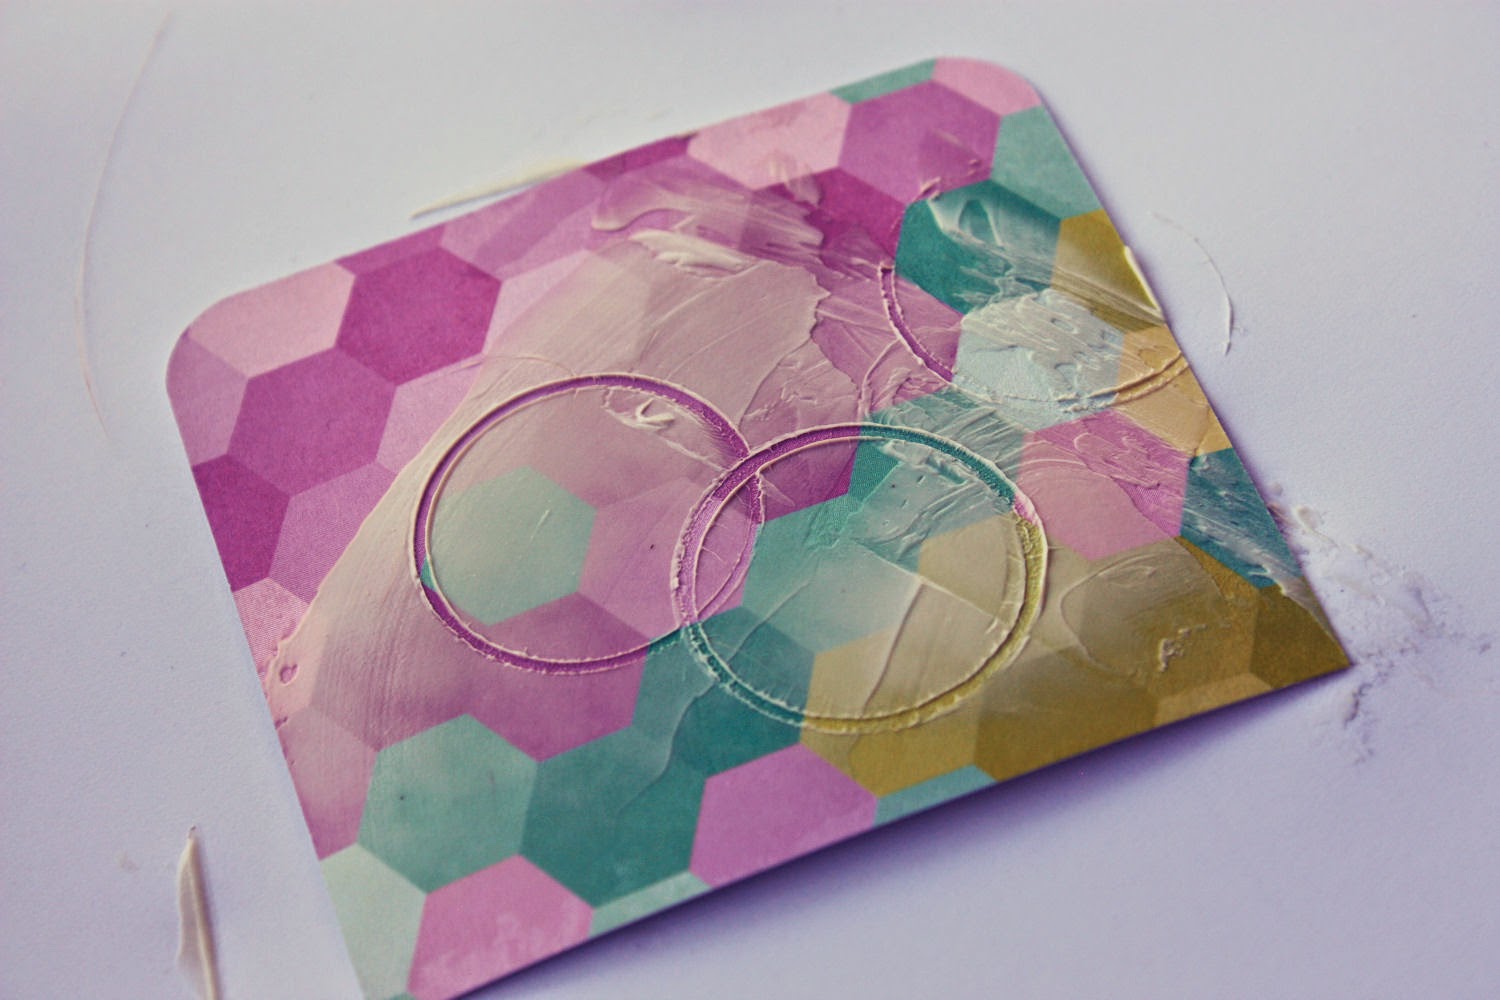
I love this look. On this card I used the modelling paste and spread it
over most of the PL card using my palette knife. I then used the lid
from my color bloom mists to stamp into the paste and left it to dry. A
simple star element and sequins finishes off this card

step 1
Scoop out a small amount of modelling paste using your palette knife.
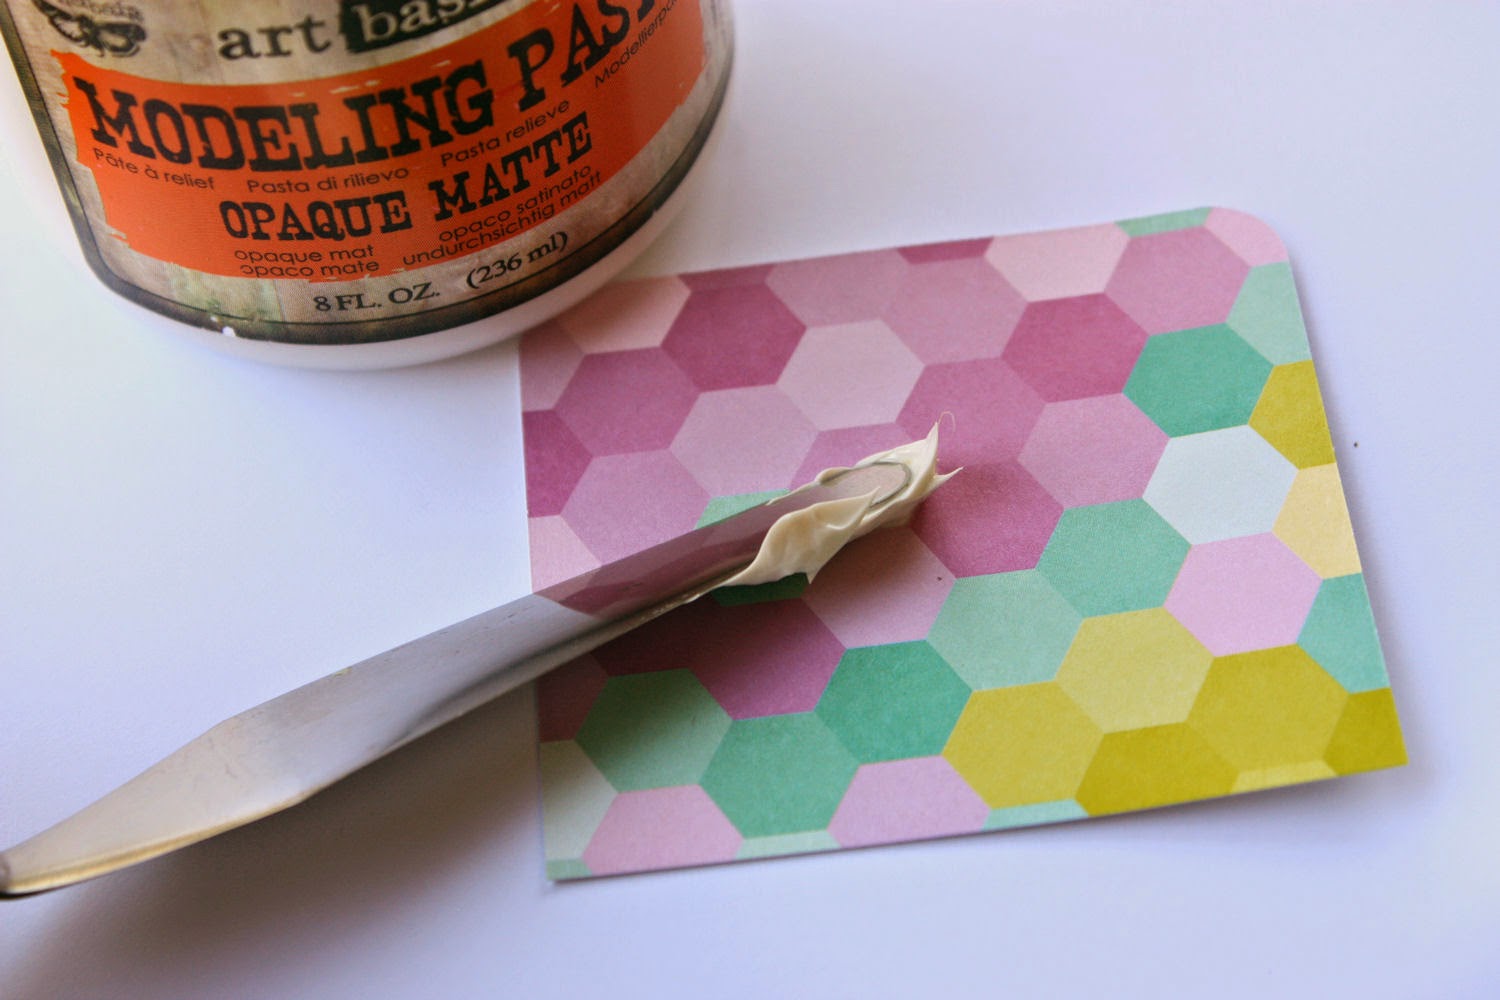
Step 2
Spread the paste out over your PL card in a thin smooth layer
Spread the paste out over your PL card in a thin smooth layer

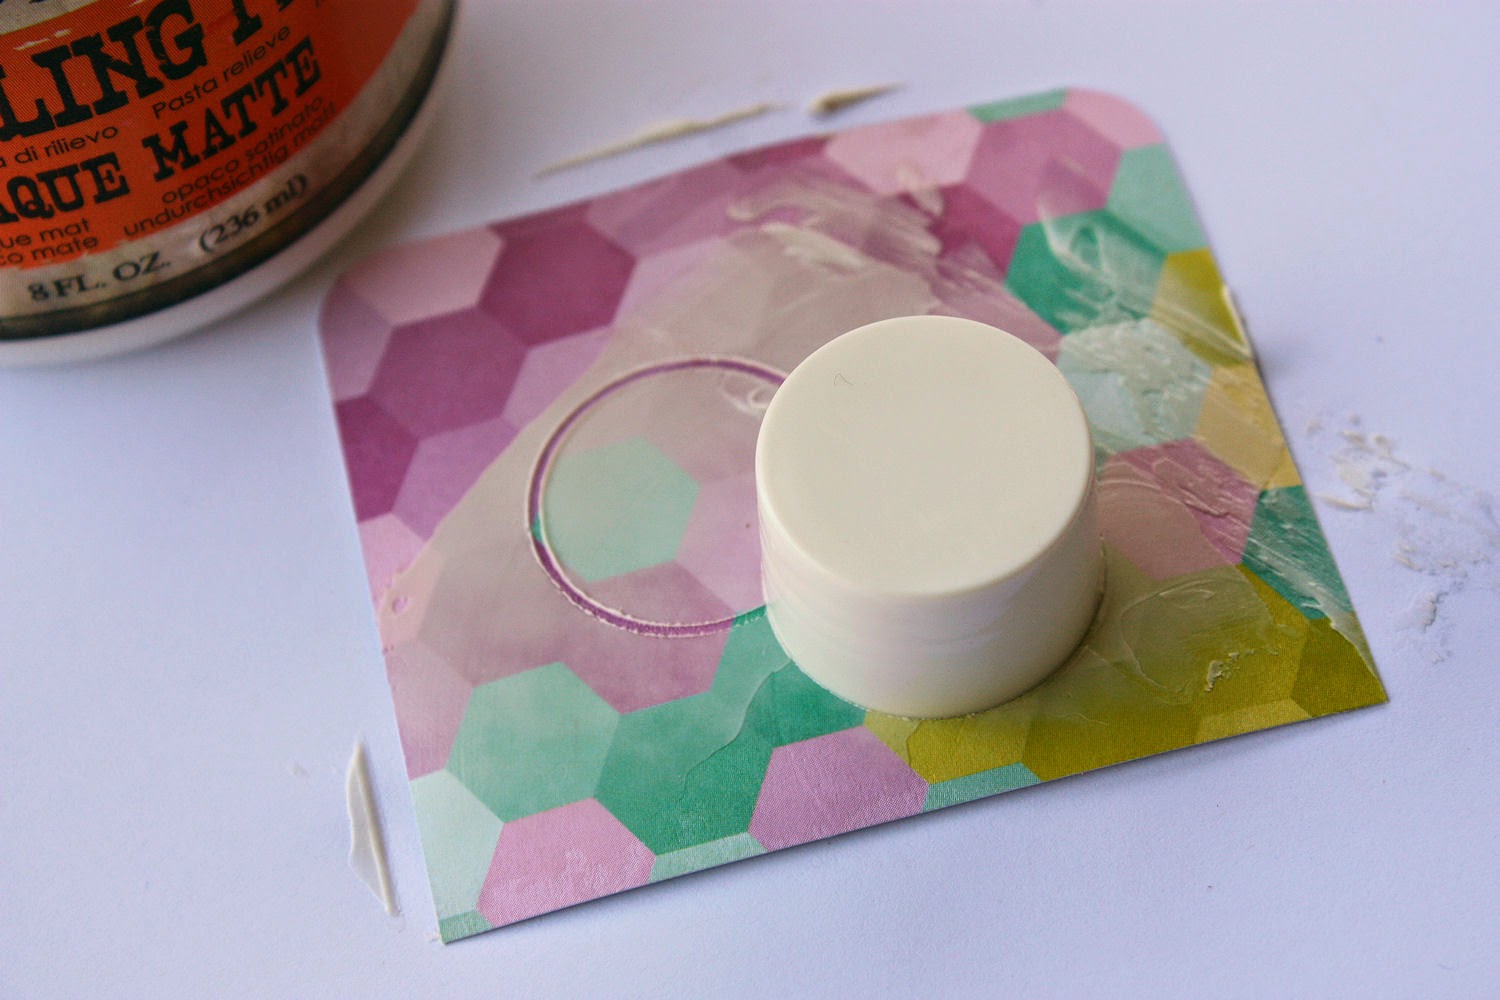
Step 3
Use a lid to stamp into your paste. You can also do this with rubber stamps for a fun and funky textured look.
Use a lid to stamp into your paste. You can also do this with rubber stamps for a fun and funky textured look.
Step 4
Leave the paste to dry naturally and then dress up your card using embellishments and inks.
Leave the paste to dry naturally and then dress up your card using embellishments and inks.
Opaque Modelling paste....
Opague: adjective adjective: opaque; comparative adjective: opaquer; superlative adjective: opaquest 1. 1. not able to be seen through; not transparent.”bottles filled with a pale opaque liquid”.Non transparent, cloudy, filmy, blurred, hasy, smeared, misty
Opaque modelling paste allows you to add the paste over certain areas
making them cloudy with texture but not totally covering what is
underneath it. The beauty of this product is that I can use it over my
Project Life cards without covering the beautiful colours and designs
totally, but adding a workable surface for texture and stamping. Opaque
products can also be coloured using paint, pigments and dye inks so you
can customize it at any time.

I love how these mixed media products from Prima enables me to alter and
change the look of my PL cards without totally taking away what drew my
attention to them in the first place.
Products Used
- PM 961411 Finnabair Art Basics Modeling Paste
- PM 961725 Finnabair Art Ingredients Mica – Mulberry
- PM 573768 Color Bloom Spray – Tea Stain
- AC 380333 Project Life Kit – Hi, Sunshine (180 Cards)
- Silhouette CAMEO® Electronic Cutting Tool Other:
- Prima Stencil, Palette Knife, Heidi Swapp Embellishments, Color Bloom Mist Bottle Top


1 comments